The Wandering DP Podcast: Episode #62 – Shaping the Sun
In today’s episode of the podcast we look at shaping the sun in your cinematography and how a simple formula can help you get some nice results.
This is a formula I just came up with that describes the way I like to use the sun in my exterior day shots. This formula, like every other, is made to be broken but it is nice to have in your back pocket if you want somewhere nice and basic to start from.
Donate to the Podcast
The Formula
Sun ——– Camera ——— Talent (looking towards sun side)
The formula is simple but putting it into practice can be a bit trickier. Let’s start by taking a closer look at each of the three components.
The Sun
Ideally this should be backlighting your subject. This formula only works if that is the case. The sun should be behind your subject and at an angle to camera.
If the sun is directly behind the talent you may get some unwanted sun blow out in your sky and the saturation of the sky may not be fantastic. If it is too far around the front you start to lose the edginess and the image will get a bit flatter with harsher shadows.
The other great thing about shooting into backlight is the background should be dark with just a few edy highlights. This helps pull your talent away from the background because it is dark and they are surrounded by a little glowing edge from the sun.
The Camera
This is the easiest bit of the equation. All you have to do is place the camera between the sun and your talent.
The formula creates a triangle so as to avoid the dreaded SUN SANDWICH (SS). If you block out the scene so you have sun, then talent, then camera you are going to end up with a SS. You need to have the camera between the sun and the talent. That is it.
The Talent
For this equation to ensure you avoid the dreaded SS you need the talent to be looking in the direction of the sun. That doesn’t mean they are looking at the sun. It means that if you are looking through the viewfinder, the talent should be looking in the same direction the sun is coming from. Easy.
Shaping the Sun Examples
Let’s take a look at some examples to get a bit of a better understanding.
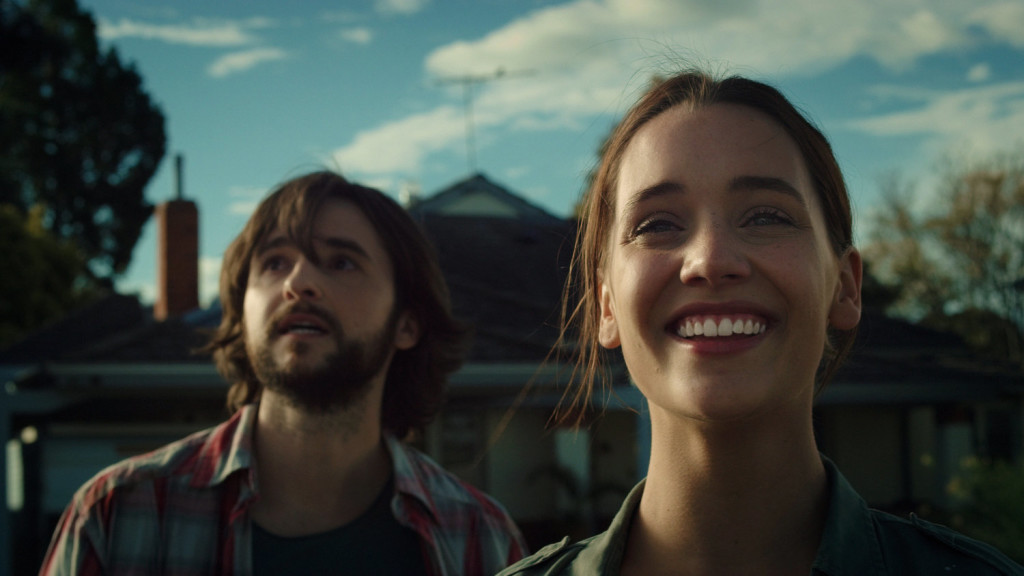
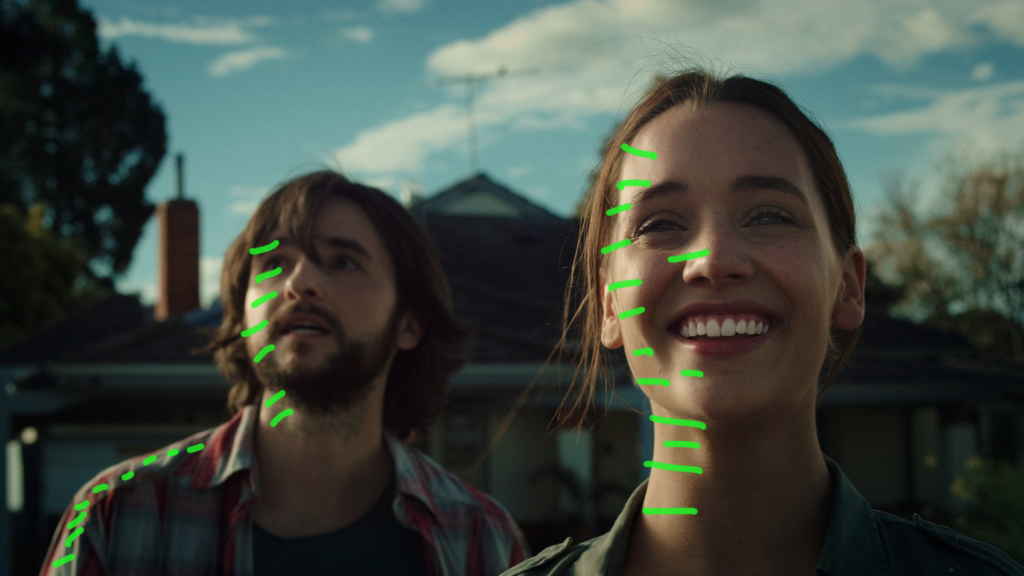
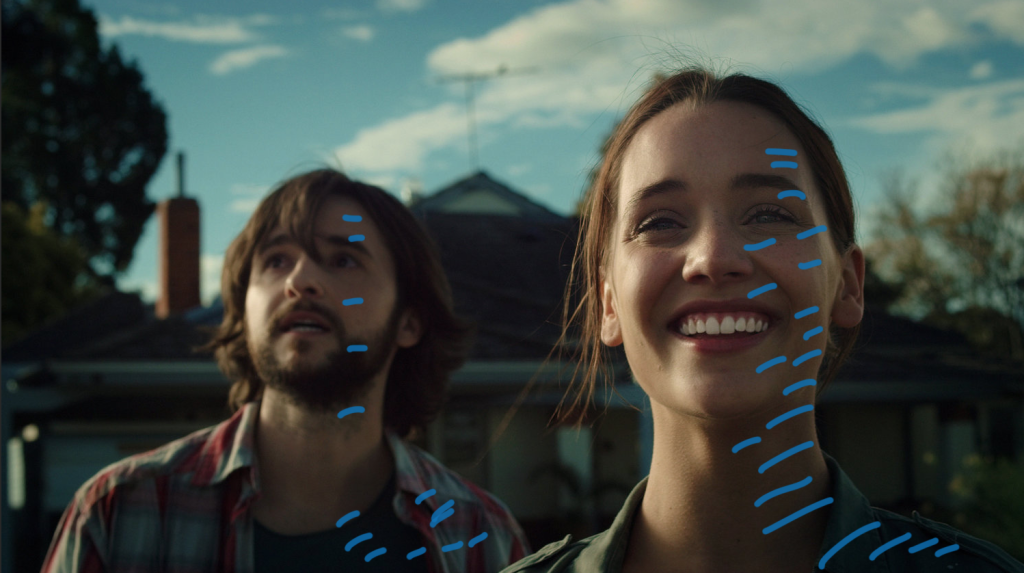
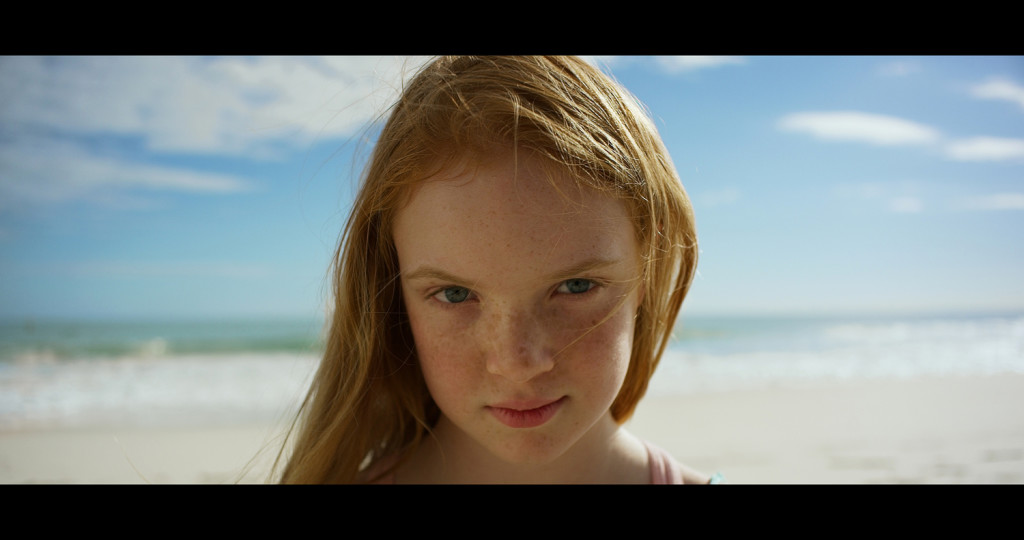
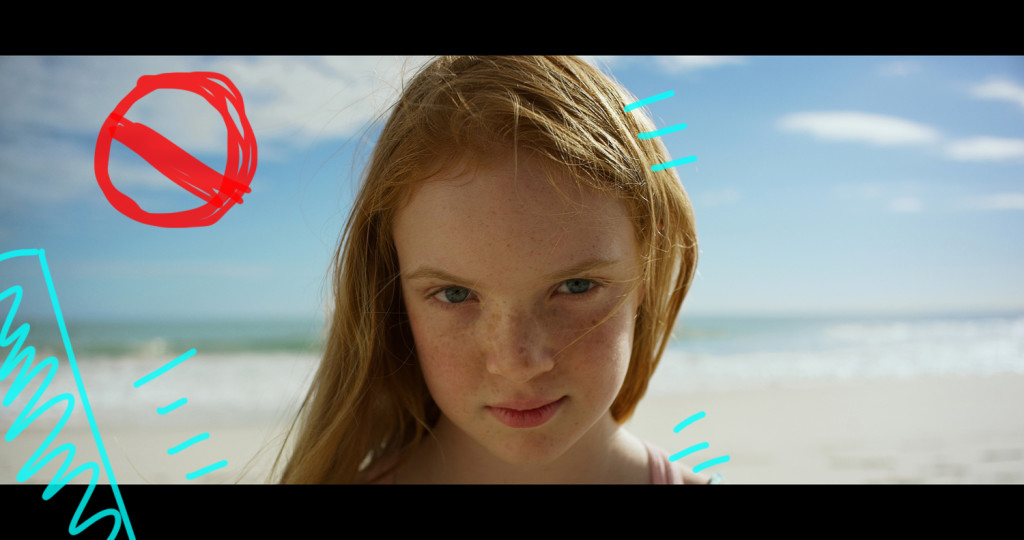
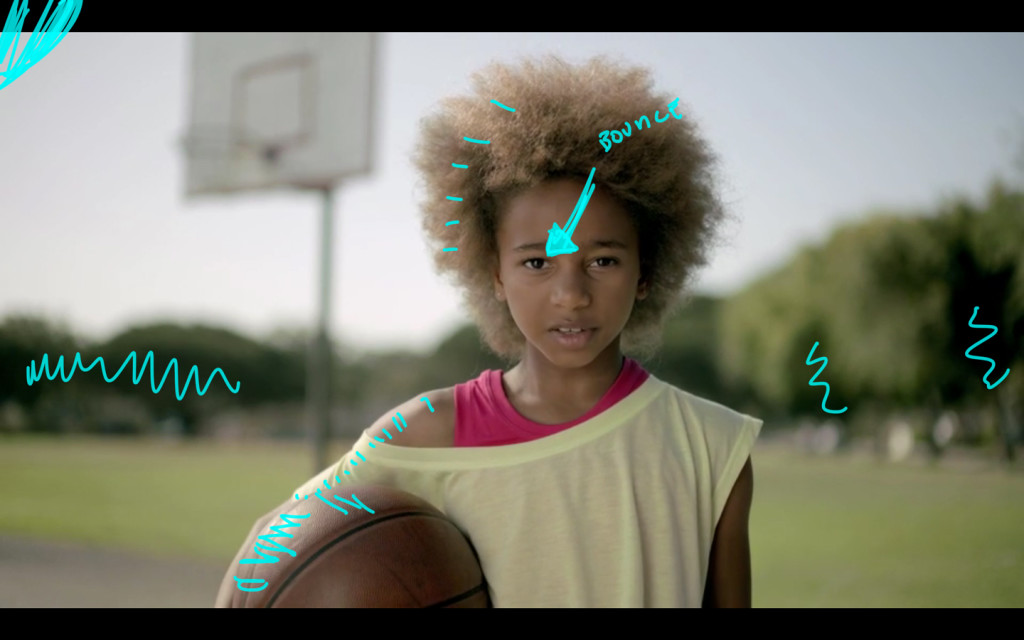
In this first example the sun is off at an angle where it is sort of backlighting (more edgy) the talent. The camera is in between the talent and the sun. The talent are looking in the same direction as the sun.
Voila.
The Break Down
So what does the set up look like for something like this?
The Camera info:
RED Weapon @ 6k FF
Arri Zeiss Master Prime 65mm @ T2.0
ISO 500/25 fps
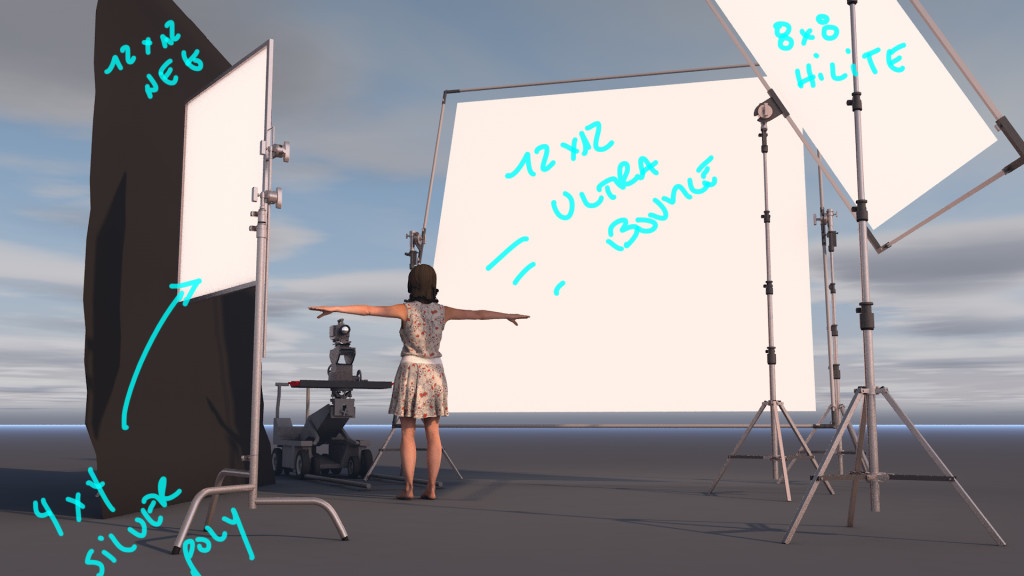
Lighting Equipment:
1 12×12 Ultra bounce
1 8×8 HiLite
1 12×12 Black
1 4×4 Silver Poly
4 Blacks
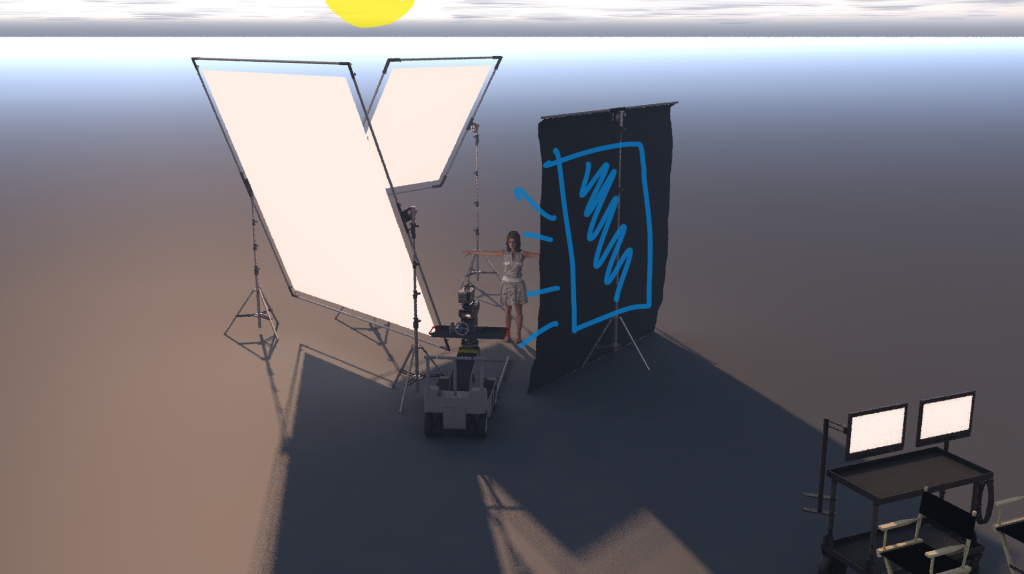
Here is our set up in 3d: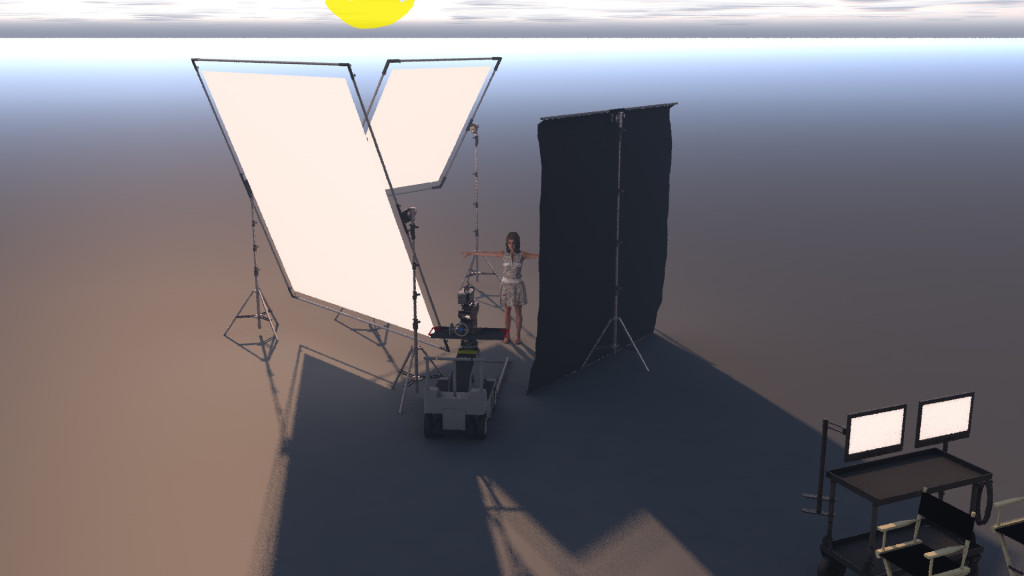
Lighting Steps:
Step #1: The Sun/Edge
 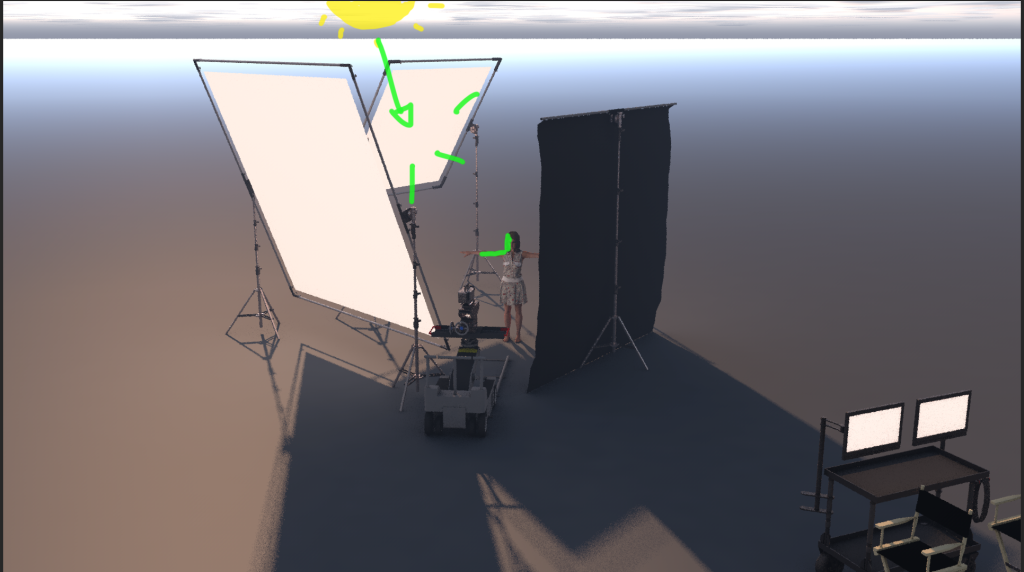
We can’t control the level of the blue sky or the levels on the background so we have to balance everything to those levels. We start with the sun. It is too harsh so we take an 8×8 Hilite and soften it while knocking out a bit of bite.
Step #2: The Wrap
 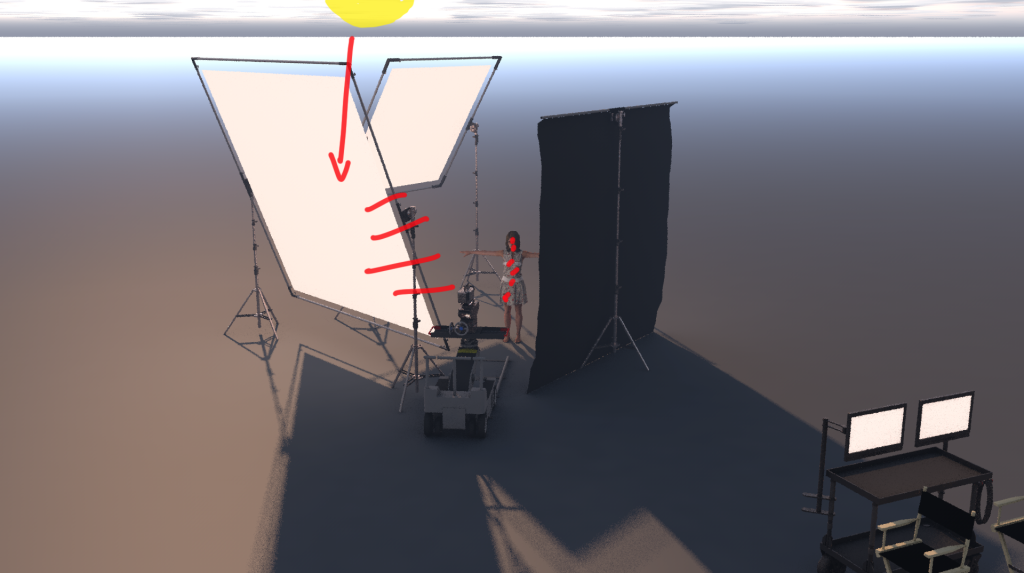 Next up is the wrappiness of the sun. We want to fill in their faces a bit to make the fall off from light to dark more gradual. We take the 12×12 Ultrabounce and place it just left of camera. Next up is the wrappiness of the sun. We want to fill in their faces a bit to make the fall off from light to dark more gradual. We take the 12×12 Ultrabounce and place it just left of camera.
We play with the position so that we get just enough fill without it feeling filly. Should seem probable.
Step #3: The Contrast
We need to add a little dramatic contrast. To do that we throw in a 12×12 black to knock out any level coming from Camera right. Again we shuffle the thing in and out until we get to a probable level.
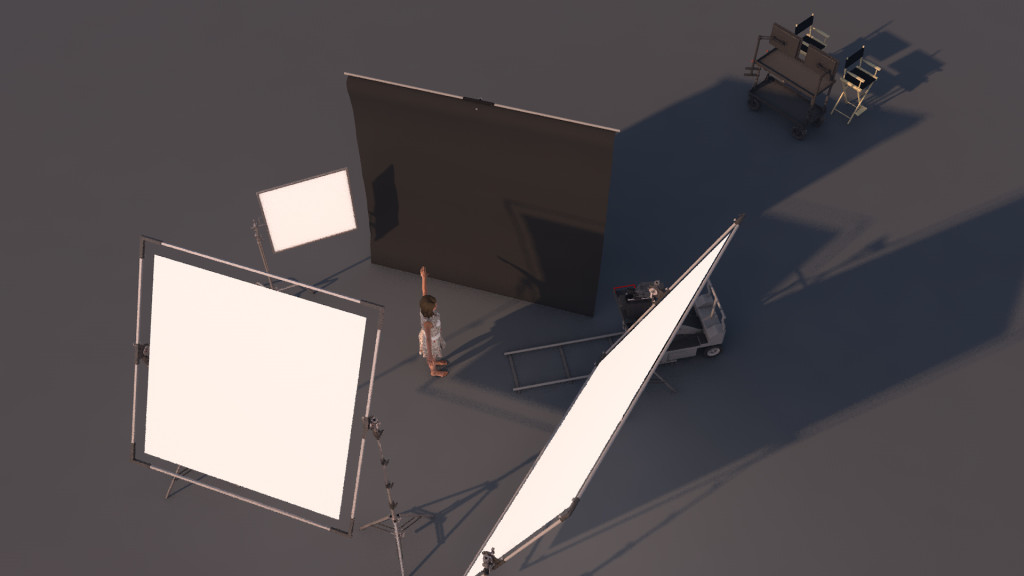
Step #4: The Last Little Drip
 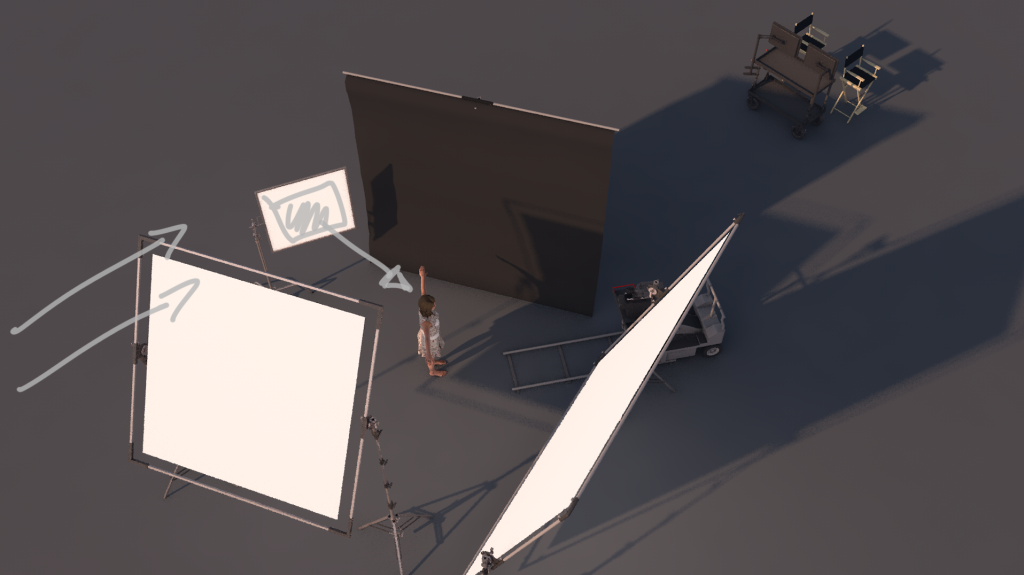
The image is already looking pretty good but just to top it off we throw in a 4×4 silver poly and position it so it is getting direct sun. Then we bounce that harsher light on to the talent’s near side to camera.
That little edge pulls them just that little bit more away from the background.
That is it.
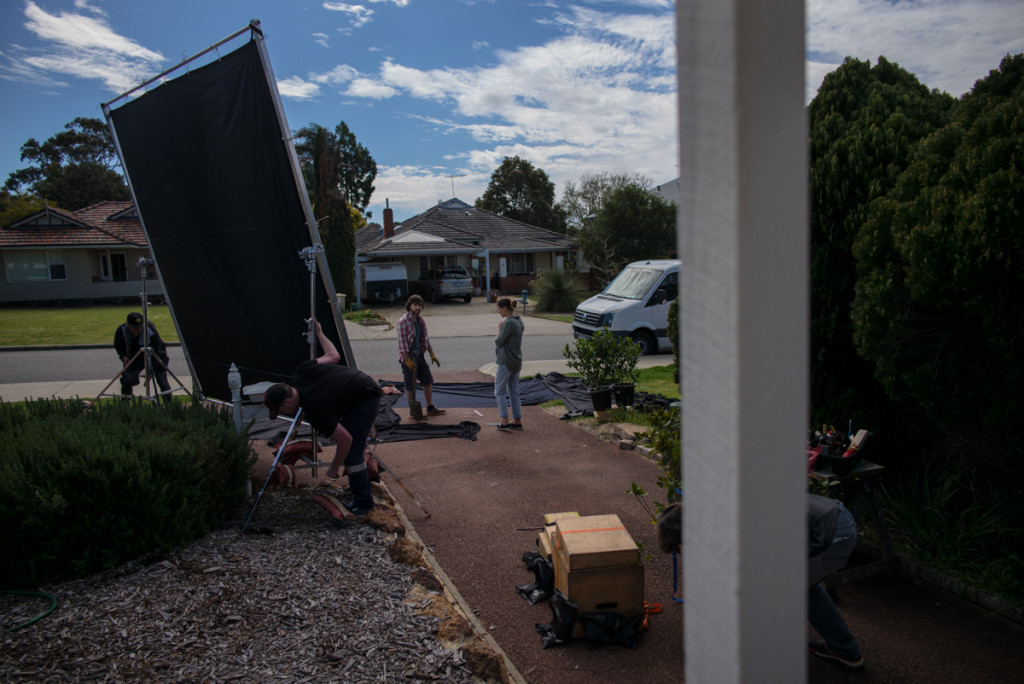
Here is a little behind the scenes photo as we started to set up the shot:
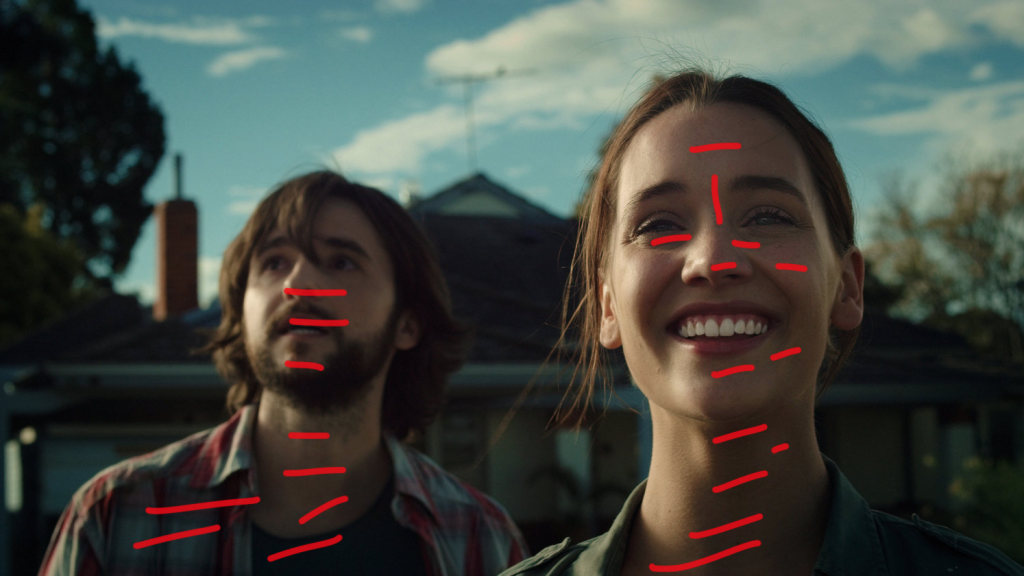
The SUN SANDWICH
This is the opposite of the technique I just showed. In this technique (I use the word loosely) you bounce from the opposite side of the sun. When you do that you create a two light sandwich which doesn’t look near as natural.
Sometimes though you don’t really have a choice because the location/director/whatever dictates you go this route. You can still get some nice stuff but just not ideal for a more natural light feel.
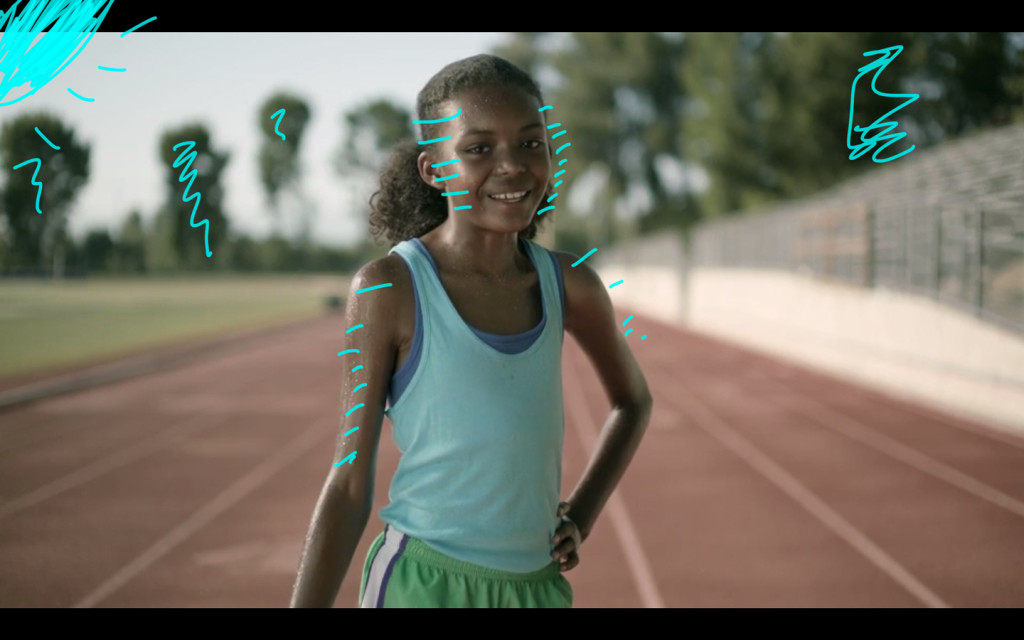
Further Examples: Shaping the Sun
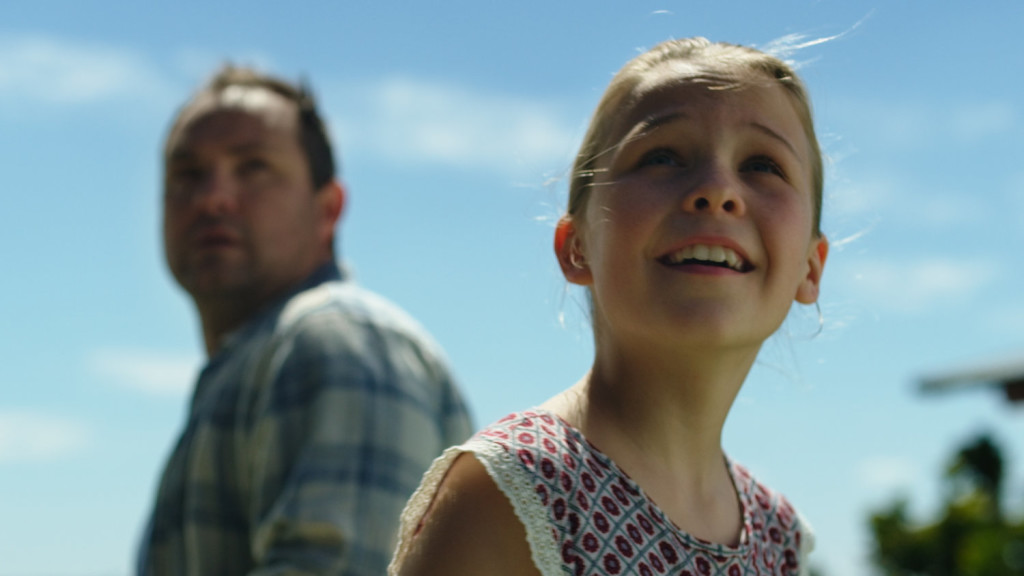 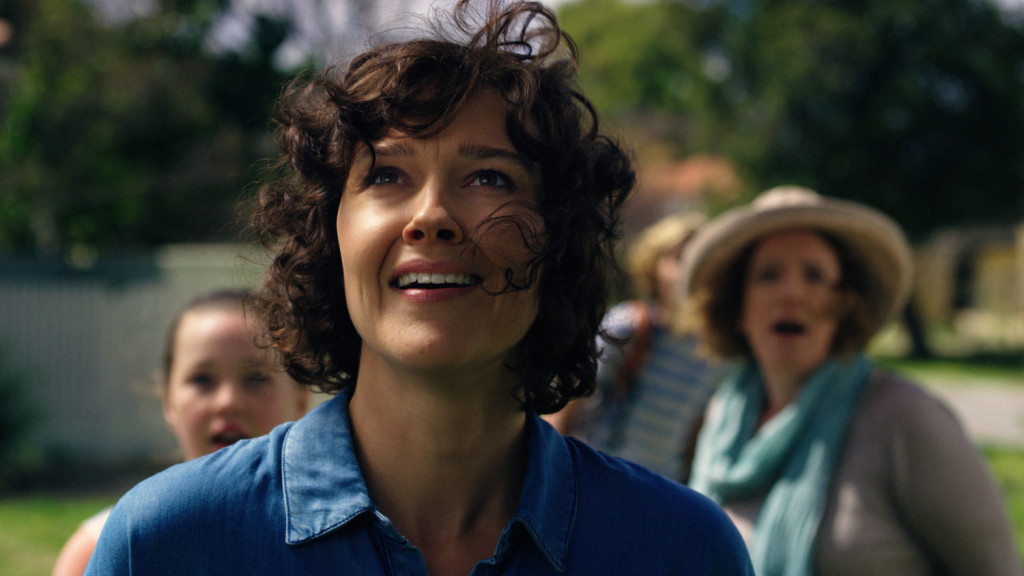
This is the ad where I saw this sort of set up and got the inspiration from:
Conclusion
This formula isn’t ground breaking stuff but I never had it explained to me so I thought I would share it here. It can apply to any exterior set up from a wide to something in tight. As long as you get the sun/camera/talent blocking in the right orientations relative to one another you can use it anywhere.
Donate to the Podcast
The post The Wandering DP Podcast: Episode #62 – Shaping the Sun appeared first on Cinematography Podcast & Tutorials. |


.png)
 More
More
 Religion & Spirituality
 Education
 Arts and Design
 Health
 Fashion & Beauty
 Government & Organizations
 Kids & family
 Music
Music News & Politics
 Science & Medicine
 Society & Culture
 Sports & Recreation
 TV & Film
 Technology
 Philosophy
 Storytelling
 Horror and Paranomal
 True Crime
 Leisure
 Travel
 Fiction
 Crypto
 Marketing
 History